LEVERAGING UNSTRUCTURED DATA
GETTING STARTED WITH GCP CONSOLE
When the lab is ready a green button will appear that looks like this:

When you are ready to begin, click Start Lab.
Logging in to Google Cloud Platform
Step 1: Locate the Username, Password and Project Id
Press the green [Start] button to start the lab. After setup is completed you will see something similar to this on the right side of the Qwiklabs window:

Step 2: Browse to Console
Open an Incognito window in your browser.
And go to http://console.cloud.google.com
Step 3: Sign in to Console
Log in with the Username and Password provided. The steps below are suggestive. The actual dialog and procedures may vary from this example.

Step 4: Accept the conditions
Accept the new account terms and conditions.

This is a temporary account. You will only have access to the account for this one lab.
- Do not add recovery options
- Do not sign up for free trials
Step 5: Don't change the password
If prompted, don't change the password. Just click [Continue].

Step 6 Agree to the Terms of Service
Select (x) Yes, (x) _Yes and click _[AGREE AND CONTINUE].

Step 7: Console opens
The Google Cloud Platform Console opens.
You may see a bar occupying the top part of the Console inviting you to sign up for a free trial. You can click on the [DISMISS] button so that the entire Console screen is available.

Step 8: Switch project (if necessary)
On the top blue horizontal bar, click on the drop down icon to select the correct project (if not already so). You can confirm the project id from your Qwiklabs window (shown in step 1 above).

Click on "view more projects" if necessary and select the correct project id.
PART 1: CREATING DATAPROC CLUSTERS
Overview
Duration is 1 min
In this lab, you will create, customize and delete Dataproc clusters using the Web console and the command line interface (CLI). You will also connect to the cluster using SSH, and run a couple simple jobs. You will also access the cluster's Hadoop and HDFS services from the browser.
What you learn
In this lab, you:
- Create a Dataproc cluster from the Web console
- SSH into the cluster and run PySpark jobs
- Add a firewall rule that allows access to your cluster from the browser
- Create, manage and delete Dataproc clusters from the CLI
Introduction
Duration is 1 min
Dataproc is a managed service for creating clusters of computers that can be used to run Hadoop and Spark applications. Dataproc clusters are pre-configured with software commonly used in Hadoop ecosystems like Python, Java, PySpark, Pig and Hive. Dataproc clusters are also pre-configured with HDFS.
Dataproc clusters can easily be created in just a couple minutes and clusters can be easily configured to run jobs both big and small. Because clusters can be created so quickly, they can also be deleted as soon and jobs are complete. With Google's per-minute billing, this allows jobs to be run at a minimal cost.
Dataproc requires no upfront payment. You only pay for the resources used for the time the clusters are running.
Before you begin
Duration is 1 min
If you have not started the lab, go ahead and click the green "Start Lab" button. Once done, it will display credentials for this lab. Repeat the steps in Lab 0 to log into the Cloud console with the credentials provided in this lab.
Here is a quick reference:
Open new incognito window → go to cloud console → login with provided credentials → follow the prompts → switch project if necessary
Create Clusters with the Web Console
Duration is 10 min
You will first create a cluster using the Google Cloud Platform Web Console.
Step 1
Open the Cloud Platform Console and navigate to the project you are using for this course.
Note: If a different project is selected, click the project name to the right of Google Cloud Platform in the title bar and choose the right one.
Step 2
Click the menu on the left and select Compute Engine. This ensures that any necessary fraud checks are carried out and APIs are enabled. It will reduce the wait times associated with later steps if you do this now.
Step 3
Click the menu icon on the left corner of the Google Cloud Platform Web Console, scroll down to the Big Data section and select Dataproc.
Note: If you get an "Enable API" popup, go ahead and click Enable.
Step 4
Click the Create cluster button. This opens the Create a cluster page.
Step 5
You will create the smallest possible cluster.
- Name your cluster my-first-cluster.
- Select the zone us-central1-a.
- In the Master node | Machine type drop-down select the first machine n1-standard1(1vCPU, 3.75GB memory).
- Change the master node's primary disk size to 10 GB.
- In the Worker nodes | Machine type drop-down also select the first machine n1-standard1(1vCPU, 3.75GB memory).
- Leave the number of worker nodes at the default of 2.
- Also change the worker node's primary disk size to 10 GB.
Step 6
Click the Create button at the bottom on the page. It will take a couple minutes for the cluster to be ready.
Accessing the Cluster Master with SSH
Duration is 15 min
You will SSH into the master node and and discover what is installed and run a simple job.
Step 1
When you see a green check next to the cluster you just created click on the cluster name. This opens the Cluster details page.

Step 2
Click the VM Instances tab to see a list of machines in your cluster. Click on the master node (my-first-cluster-m), to see that machine's details.
Step 3
Click the SSH button to connect to that machine. This will open a new window or tab in your browser with a terminal window that is connected to your master node machine.

Step 4
Type the following command to see what version of Python is installed.
python --version
Step 5
Enter the following commands as well to see some of the programs that are pre-installed on the machine.
java -version

scala -version

pyspark --version

pig --version

hive --version
Accessing the Cluster Master with the Browser
Duration is 10 min
Step 1
In the Google Cloud Platform Web Console, click the menu on the left and select VPC Network > Firewall rules from the Networking section.
Step 2
You are going to allow access to your Dataproc cluster, but only to your machine. To do this, you will need to know your IP Address. Go to the following URL to find out what it is:
Step 3
Click Firewall rules in the left-hand navigation pane. Click on the Create Firewall Rule button. Then, Enter the following:
- Name the rule .
- For Targets, select "All instances in the network"
- Select IP ranges from the Source filter dropdown.
- In the source IP ranges text box enter your ip address followed by /32. So if your IP address is 1.2.3.4 then the text box would read 1.2.3.4/32.
- For Protocols and ports, select "Specified Protocols and ports", and enter the following in the text box:

Once you have confirmed your entries, click Create.
Note: This firewall rule allows access to tcp port 8088 which is Hadoop, 9870 which is HDFS and 8080 which is Datalab. We will install Datalab later in the course.
Step 4
In the Web Console go back to the Dataproc service. Click on your cluster to open its details. Then, click on VM Instances, then click on your master node to see its details.
Scroll down and find your master node's external ip address, select it and copy it to your clipboard.
You could also find the master node's IP address from the Compute Engine service. All the nodes in the Dataproc cluster are really Compute Engine virtual machines. Go to the Products and Services menu and select Compute Engine. Find your master node, it should be named my-first-cluster-m. You can copy the external IP address from the machine's details.
Step 5
Open a new tab in your browser and paste in the ip address of your master and then type :8088 to access Hadoop. It should open a page that looks like the one below.

Step 6
Click on the various links on the left and explore the information.
Step 7
Now, open another browser tab, paste in the master node's IP address, followed by the port 9870. This opens a site with information about your HDFS cluster similar to as shown below. Explore this as well.

Step 7
Close the Hadoop and HDFS browser tabs. Go back to the window with the console and close it as well.
Step 8
In the Web Console, return to the Dataproc service home page. Select the checkbox next to your cluster and click the Delete button.

Managing Clusters with the CLI
Duration is 10 min
You will now create a cluster using the command line interface (CLI).
Step 1
In the Google Cloud Platform Web Console, use the menu to navigate to the Dataproc service.
Step 2
Now, click on the Activate Google Cloud Shell icon on the right side of the toolbar. This will open a Cloud Shell terminal window on the bottom of your browser.

Step 3
Paste the following command into cloud shell and hit Enter. This command creates a Dataproc cluster named my-second-cluster in the us-central1-a zone. It creates a master node with 1 CPU and a 50 GB disk and 2 worker nodes with the same resources.
gcloud dataproc clusters create my-second-cluster --zone us-central1-a \
        --master-machine-type n1-standard-1 --master-boot-disk-size 50 \
        --num-workers 2 --worker-machine-type n1-standard-1 \
        --worker-boot-disk-size 50
Step 4
Notice, on the Dataproc home screen at the top of your browser that a cluster is being created (if you do not see it, click the Refresh link on your Clusters page). When the green check appears, click on the cluster and explore its details.
- What machine type is used for the master and worker nodes?
- How many workers nodes were created?
Step 5
Paste the following command into cloud shell and hit Enter. This command deletes the cluster you just created. When prompted, confirm that you want to delete your cluster.
gcloud dataproc clusters delete my-second-cluster
Step 6
Wait for your cluster to go away in the Web console (you may need to click on Clusters on the menu on the left, and click Refresh). Then click the Create cluster button. Fill in the form with the following settings, but do not click the Create button.
- Name the cluster my-third-cluster.
- Set the zone to one near you (whichever one you wish).
- Set master node machine type to the smallest machine available.
- Set the worker nodes machine type to the smallest machine available.
- Specify 2 worker nodes
Below the Create and Cancel buttons, click the link which reads command line. This pops up a window with a command that uses the settings you've specified. Copy this command to the clipboard, close the window and then paste it into the Cloud Shell and run it.
Click the Cancel button on the Create a cluster page. Notice another cluster is being created.
Step 7
When the cluster is done initializing, explore its details and make sure it was created as you expected.
Step 8
Using the Web Console Products and Services menu, go to the Compute Engine service. Notice the master and worker nodes are really Compute Engine virtual machines.
Cleanup
Duration is 1 min
There's no need to keep any clusters.
Step 1
Navigate to the Dataproc service using the Web Console. Delete any clusters that you created in this exercise.
| Stop here if you are done. Wait for instructions from the Instructor before going into the next section |

PART 2: RUNNING PIG AND SPARK JOBS
Overview
Duration is 1 min
In this lab, you will run Pig and Spark programs on a Dataproc cluster.
What you learn
In this lab, you:
- SSH into the cluster to run Pig and Spark job
- Create a Cloud Storage bucket to store job input files
- Work with HDFS
Introduction
Duration is 1 min
Google Cloud Dataproc supports running jobs written in Apache Pig, Apache Hive, Apache Spark, and other tools commonly used in the Apache Hadoop ecosystem.
For development purposes, you can SSH into the cluster master and execute jobs using the PySpark Read-Evaluate-Process-Loop (REPL) interpreter.
Let's take a look at how this works.
Creating a Dataproc Cluster and storage bucket
Duration is 5 min
You will create a cluster and also create a storage bucket that will hold some files that you will use to submit jobs.
Step 1
If you did not create a firewall rule called in the previous section, please do so now. You will have to find your IP address using http://ip4.me/ and then go to the Networking section of the GCP console. Select VPC Network > Firewall rules. Click on the Create Firewall Rule button. Then, Enter the following:
- Name the rule default-allow-dataproc-access.
- For Targets, select "All instances in the network"
- Select IP ranges from the Source filter dropdown.
- In the source IP ranges text box enter your ip address followed by /32. So if your IP address is 1.2.3.4 then the text box would read 1.2.3.4/32.
- For Protocols and ports, select "Specified Protocols and ports", and enter the following in the text box:
If you created the firewall rule in the previous lab, but you are connecting from a different network IP address, modify the firewall rule in the networking section to add your new IP address.
Step 2
In Google Cloud Shell, enter the following command to create a cluster:
gcloud dataproc clusters create my-cluster --zone us-central1-a \
        --master-machine-type n1-standard-1 --master-boot-disk-size 50 \
        --num-workers 2 --worker-machine-type n1-standard-1 \
        --worker-boot-disk-size 50 --network=default
Step 3
In __Google Cloud Shell, __enter the following command to create a Cloud Storage bucket with the same name as your project ID in the same region as your cluster. Both Cloud Storage buckets and Project ID's have to be unique, so unless you are very unlucky your project ID would not have been previously used for a bucket name.
gsutil mb -c regional -l us-central1 gs://$DEVSHELL_PROJECT_ID
Step 4
Use the menu in the Web Console to navigate to the Storage service. Confirm that your bucket was created.
Copy code and files to bucket
Step 1
Open __Google Cloud Shell __and enter the commands below to copy some pre-created files into your bucket (make sure to plug in your bucket name).
git clone https://github.com/GoogleCloudPlatform/training-data-analyst
cd training-data-analyst/courses/unstructured
./replace_and_upload.sh <YOUR-BUCKET-NAME>
Developing using PySpark REPL
Duration is 15 min
You will SSH into the master node and and run the Python Spark Read-Evaluate-Process-Loop (REPL) interpreter.
Step 1
Navigate to your Dataproc cluster and click on the cluster name. This opens the Cluster details page.
Step 2
Click the VM Instances tab to see a list of machines in your cluster. Click on the master node (my-cluster-m), to see that machine's details.
Step 3
Click the SSH button to connect to that machine. This will open a new window or tab in your browser with a terminal window that is connected to your master node machine.
Step 4
Type pyspark at the command prompt to open the PySpark shell.
Step 5
Enter the following code and then hit Enter to run a simple PySpark job.
data = [0, 1, 2, 3, 4, 5]  # range(6)
distData = sc.parallelize(data)
squares = distData.map(lambda x : x*x)
res = squares.reduce(lambda a, b : a + b)
print res
What does this program do?
Step 6
This step is optional -- please feel free to skip this step. Write a PySpark program to compute the square root of the sum of the first 1000 terms of this series starting at k=0:
8.0/((2k+1)(2k+1))
i.e. compute:
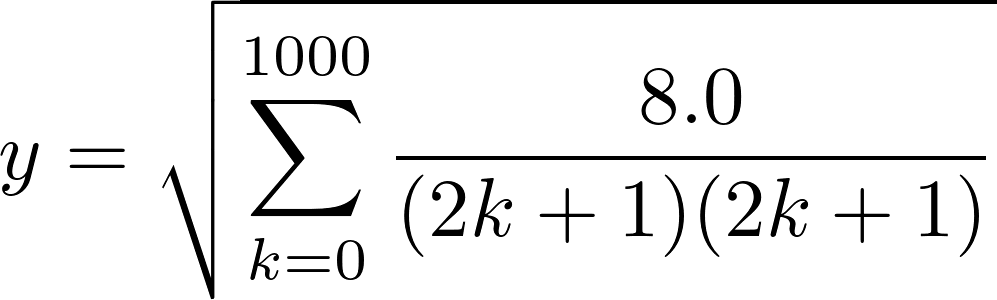
What is the result? (one potential solution is shown below)
import numpy as np
data = range(1000)
distData = sc.parallelize(data)
terms = distData.map(lambda k : 8.0/((2*k+1)*(2*k+1)))
res = np.sqrt(terms.sum())
print res
It's your favorite irrational number!
Step 7
Exit Spark by typing:
quit()
Step 8
While you could develop and run PySpark programs using the REPL, a more common way to develop PySpark programs is to use a Python notebook, and a more common way to execute PySpark programs to submit a Python file. You will do both of these in subsequent sections and labs.
Pig Job that reads from HDFS
Duration is 15 min
You will now execute a Pig job and view its results. You will also use the HDFS cluster provided by Google Cloud Dataproc
Step 1
If you don't have the SSH terminal to the cluster master still available, navigate to the Dataproc service in the Web console and click on the Clusters link. Click on your cluster (it should be named *__*my-cluster) to see its details, then click the __VM Instances tab, and then click on the master node to view its details. Finally, click the SSH button to connect to the master.
Step 2
Enter the following command to create a directory for this exercise and move into it:
mkdir lab2
cd lab2
Step 3
Enter the following command to copy a data file and a pig script into the folder you just created. Make sure to plug in your actual bucket name.
gsutil -m cp gs://<YOUR-BUCKET-NAME>/unstructured/pet-details.* .
Two files were copied from Cloud Storage to the cluster. You can view them by entering the following commands.
cat pet-details.txt
This just shows a simple data file we will copy into HDFS and then transform using Pig. Enter the following command to see the Pig script you will run, and take a minute to study it.
cat pet-details.pig
Step 4
Now let's copy the text file into HDFS. Use the following code.
hadoop fs -mkdir /pet-details
hadoop fs -put pet-details.txt /pet-details
Step 5
Go back to the Web console and the details of your master node. Find the master node's external IP address and copy it to the clipboard. Then, open a new tab in your browser, paste in the ip address and then add :9870. This will open the Hadoop management site. From the Utilities menu on the right select Browse the file system.
Verify that you have a folder called pet-details and inside it you should have a file called pet-details.txt.
Step 6
In your SSH window, run the following command to run Pig:
pig < pet-details.pig
Click Submit to start the job. It will take about a minute to run. Wait until it completes.
Step 7
Go back to the tab with the Hadoop management site and again browse the file system. The output from this Pig job should be in a folder called GroupedByType. If you look in that folder you should see a file named part-r-00000.
Step 8
Let's look at the output file.
First you have to get the file off the HDFS file system. Go back to your SSH session where you are connected to the master node. You should currently be in the folder lab2. Make a directory below it and move into by entering the following commands.
mkdir ~/lab2/output
cd ~/lab2/output
Step 9
Enter the following command to get the output file from HDFS and copy it into this folder.
hadoop fs -get /GroupedByType/part* .
Finally, enter the following command to view the results.
cat *
Compare the original data file, the Pig script and the final output. Try to figure out why the output is the way it is.
Cleanup
Duration is 1 min
There's no need to keep any clusters.
Step 1
Close the hadoop tab as well as the SSH window.
Step 2
Navigate to the Dataproc service using the Web Console. Delete any clusters that you created in this exercise.
| Stop here if you are done. Wait for instructions from the Instructor before going into the next section |
PART 3: SUBMITTING DATAPROC JOBS
Overview
Duration is 1 min
In this lab, you will create a Dataproc cluster. You will then submit some jobs to the cluster using the Web Console and the CLI. You will also monitor job progress, view job details and view the results of jobs.
What you learn
In this lab, you:
- Create a Cloud Storage bucket to store job input, output and application files
- Submit jobs using the Web Console
- Submit jobs using the CLI
- Monitor job progress and view results
Introduction
Duration is 1 min
Jobs can be submitted easily using the Web console and you can easily view job status and results in the console as well.
You can also submit jobs programmatically using the CLI. This would be likely in a real-world scenario where you were trying to automate big-data processing jobs.
Let's take a look at how this works.
Creating a Dataproc Cluster
Duration is 5 min
You will create a cluster and also create a storage bucket that will hold some files that you will use to submit jobs.
Step 1
In Google Cloud Shell, enter the following command to create a cluster:
gcloud dataproc clusters create my-cluster --zone us-central1-a \
        --master-machine-type n1-standard-1 --master-boot-disk-size 50 \
        --num-workers 2 --worker-machine-type n1-standard-1 \
        --worker-boot-disk-size 50 --network=default
Step 2
If you skipped the previous lab, open __Google Cloud Shell __and enter the commands below to create a bucket and copy some pre-created files into your bucket (make sure to plug in your bucket name).
gsutil mb -c regional -l us-central1 gs://$DEVSHELL_PROJECT_ID
git clone https://github.com/GoogleCloudPlatform/training-data-analyst
cd training-data-analyst/courses/unstructured
./replace_and_upload.sh <YOUR-BUCKET-NAME>
Submitting PySpark Jobs
Duration is 10 min
In previous lab, you ran code after logging into the cluster. In the case of Pig, you copied data over to the cluster's HDFS before you ran it. In this section, you will submit a Spark job and view its results without copying anything (code or data) to the cluster.
Step 1
In the Cloud Console, navigate to Storage and click on your bucket. It should have some files in the unstructured folder. Click on the file, lab2-input.txt and view its contents. This file contains a comma separated list of keys and values.
Also view the contents of the file, lab2.py. This is a PySpark job that organizes the input file by key and the total number for each type of pet. Notice that both the code and data are on Cloud Storage. We have not copied either of these to the cluster.
Step 2
Navigate to the Dataproc service in the Web Console.
Step 3
In the left-hand navigation pane select Jobs. Then click the Submit job button.
Step 4
At this point you should have one cluster called my-cluster. Make sure it is selected in the Cluster dropdown.
In the Job type dropdown, select PySpark.
In the Main python file text box enter the path to the PySpark file lab2.py that is in your bucket. It should be in the form shown below, but replace
Step 5
No other options are required, so click Submit button at the bottom of the form.
Step 6
Wait for the job to succeed and then click on the Job ID to see its details. Take a look at the job output to see the results.
Step 7
To run the job again click the Clone button and the top, then Submit the job a second time.
Step 8
To run the job using the CLI, go back to the Google Cloud Shell and paste in the following command. Don't forget to replace
gcloud dataproc jobs submit pyspark \
      --cluster my-cluster gs://<YOUR-BUCKET-NAME>/unstructured/lab2.py
Cleanup
Duration is 1 min
There's no need to keep any clusters.
Step 1
Navigate to the Dataproc service using the Web Console. Delete any clusters that you created in this exercise.
| Stop here if you are done. Wait for instructions from the Instructor before going into the next section |
PART 4: LEVERAGING GOOGLE CLOUD PLATFORM SERVICES
Overview
Duration is 1 min
In this lab, you will create a Dataproc cluster that includes Datalab and the Google Python Client API. You will then create iPython notebooks that integrate with BigQuery and storage and utilize Spark.
What you learn
In this lab, you:
- Create a Dataproc cluster with an Initialization Action that installs Google Cloud Datalab
- Run Jupyter Notebooks on the Dataproc cluster using Google Cloud Datalab
- Create Python and PySpark jobs that utilize Google Cloud Storage, BigQuery and Spark.
Introduction
Duration is 1 min
Additional software can be added to Dataproc clusters, and clusters can be customized using initialization actions. Initialization actions are simply executables that are run when the cluster is being created.
You will use a pre-built initialization action to install Datalab and a custom one to install the Google Client Python API.
Datalab allows you to write interactive Python and PySpark notebooks that are useful in data analysis. You will create a couple of notebooks in this exercise that make use of our Dataproc cluster and also integrate with Google BigQuery and Google Cloud Storage.
Creating an Initialization Action
Duration is 10 min
You will create a custom initialization action to install a Python package.
Step 1
Open the Cloud Platform Console and navigate to your project.
Step 2
Open Cloud Shell, git clone the course repository, and upload the custom initialization script to GCS. Change the bucket name as necessary.
git clone https://github.com/GoogleCloudPlatform/training-data-analyst
cd training-data-analyst/courses/unstructured/
bash replace_and_upload.sh <YOUR-BUCKET-NAME>
Step 3
View the custom initialization script. Change the bucket name as necessary.
gsutil cat gs://<YOUR-BUCKET-NAME>/unstructured/init-script.sh
What does this initialization action do on all nodes? What does it do only on the master node?
Creating a Dataproc Cluster with an Initialization Action
Duration is 10 min
You will create a cluster that will include two initialization actions: (1) a pre-built action from Google to install Datalab, and (2) a custom initialization action to install a Python package.
Step 1
Use the Products and Services menu to navigate to the Dataproc service. If you have any clusters currently running, you can delete them.
Step 2
Click the Create cluster button and set the following parameters.
- Name your cluster my-cluster.
- Select the zone us-central1-a.
- In the Master node | Machine type drop-down select the first machine n1-standard1(1vCPU, 3.75GB memory).
- In the Worker nodes | Machine type drop-down also select the first machine n1-standard1(1vCPU, 3.75GB memory).
- Leave the number of worker nodes at the default of 2.
Click on the link shown below to expand more options.

Copy and paste the following script URL into the Initialization actions text box and press Enter. (This script installs Google Cloud Datalab on your cluster's master node.)
gs://dataproc-initialization-actions/datalab/datalab.sh
Copy and paste this second initialization action into the Initialization actions text box and press Enter. Change the bucket name appropriately. (This script installs the Google Python Client API on all the machines in the cluster and clones the course repository to the Master node, so that Datalab will have access to the notebooks that are in the repository.)
gs://<YOUR-BUCKET-NAME>/unstructured/init-script.sh
Check the Project access box as shown below to allow your cluster to access other Google Cloud Platform services..

Step 3
To create the cluster, either click the Create button or click on the Command line link and copy the command onto your clipboard and then run it from Google Cloud Shell.
Step 4
It will take a little longer for your cluster to be created this time, because the scripts have to run. While you are waiting, browse to the following github site where you will find many other initialization actions that have been written for you.
https://github.com/GoogleCloudPlatform/dataproc-initialization-actions
Note: Initialization actions are really just executables that run when a cluster is being creating. They are used to install additional software or customize your cluster as required by your programs. You can include one or more initialization actions when creating Dataproc clusters.
Step 5
If you did not create a firewall rule called in the previous section, please do so now. You will have to find your IP address using http://ip4.me/ and then go to the Networking section of the GCP console. Select VPC Network > Firewall rules. Click on the Create Firewall Rule button. Then, Enter the following:
- Name the rule default-allow-dataproc-access.
- For Targets, select "All instances in the network"
- Select IP ranges from the Source filter dropdown.
- In the source IP ranges text box enter your ip address followed by /32. So if your IP address is 1.2.3.4 then the text box would read 1.2.3.4/32.
- For Protocols and ports, select "Specified Protocols and ports", and enter the following in the text box:
If you created the firewall rule in the previous lab, but you are connecting from a different network IP address, modify the firewall rule in the networking section to add your new IP address.
Step 6
When your cluster is finished initializing, click on its name to go to its details page, then click on the VM Instances tab, and finally click on the master node to view its details.
Scroll down and find the master node's external IP address and copy it to your clipboard.
Open a new browser tab, paste in this IP address and then add :8080 after the address. This opens Datalab. You will be redirected to the Datalab main screen as shown below:

Important: The reason you can browse to this port is because earlier you created a firewall rule that opened port 8080 to your machine. Be careful when opening this port. You would not want to create a rule that allowed everyone access to Datalab. If you did, then your cluster could be easily hacked.
Creating a Simple Datalab Notebook
Duration is 5 min
Let's just create a simple Python Notebook and make sure everything is working.
Step 1
On the left side of the Datalab home page click the + Notebook button.
Step 2
In the first cell, just enter the following Python code.
temp = 212.0

def toCelsius(fahrenheit):
    return (fahrenheit - 32) * 5.0 / 9.0

print toCelsius(temp)
Step 3
Click the Run button in the toolbar and examine the results. It should look as shown below. (It might take a little while for the notebook to start.)

Running a BigQuery Query
Duration is 10 min
The Python package Pandas comes with support to run BigQuery queries.
Step 1
In the second code block add the following code and click Run. These import statements will allow you to run a BigQuery query.
import pandas as pd
from pandas.io import gbq

print "Imports run."
Step 2
In the next code block, add the following code changing the projectId variable to your project id.
(You can find your project id in the Google Cloud Platform Web Console. Select Home from the Cloud Console menu.)
projectId = "YOUR-PROJECT-ID-HERE" # CHANGE
sql = """
SELECT
  year,
  AVG(weight_pounds) AS avg_weight
FROM
  publicdata.samples.natality
GROUP BY
  year
ORDER BY
  year ASC
"""

print 'Running query...'
data = gbq.read_gbq(sql, project_id=projectId)

data[:5]
Click the Run button. The BigQuery query is run and the results put into a Pandas DataFrame. The last line just outputs the first 5 records. The results are shown below

Step 3
In the next code block, add the following code to plot a graph using Pandas
data.plot(x='year', y='avg_weight');
You should get a graph that looks like this:

Step 4
In the Datalab menu bar, select Notebook | Rename. Name the notebook BigQuery-Test and then click OK. You can then close that tab and return to the Datalab Home page.
Step 5
Back at the Datalab home page in the upper right corner of the toolbar are 4 icons. Hover over the second one (the one that looks like a stack of progress bars) and the resulting tooltip should read Running Sessions. Click on that icon.

On the resulting page you should see one active notebook, the BigQuery-Test notebook you just created.
Click the Shutdown button on the right side and then close this tab.
Using PySpark in a Datalab Notebook
Duration is 10 min
The last notebook didn't run anything in parallel on your Dataproc cluster. This time, let's get a notebook from the GitHub repository and execute it. This notebook uses PySpark and makes use of your Spark cluster.
Step 1
Back at the Datalab home page in the upper right corner of the toolbar are 4 icons. Hover over the first one (the one that looks like a fork in the road) and the resulting tooltip should read Open ungit. Click on that icon.
Step 2
Fill out the form to clone the github repository corresponding to the course:
https://github.com/GoogleCloudPlatform/training-data-analyst

Then click on Clone repository
Step 3
Back on the Datalab home page click the Home icon and navigate to datalab/notebooks/training-data-analyst/courses/unstructured. Click on PySpark-Test-Solution.ipynb to open that notebook.
Step 4
In the notebook, Click on Clear | All Cells. Now, execute each cell in turn, making sure to change any occurrences of BUCKET_NAME to be the name of your bucket.
Step 5
You will want to stop this notebook as you did the previous one. Click the Running Sessions link on the right side of the toolbar. Then, click the Shutdown button to the left of the PySpark-Test-Solution notebook.
Close this tab and return to the Datalab home page.
| Stop here if you are done. Wait for instructions from the Instructor before going into the next section |
PART 5: ADDING MACHINE LEARNING TO BIG DATA ANALYSIS
Overview
Duration is 2 min
In this lab, you integrate the machine learning APIs into your data analysis. You will write the code to use the Speech, Vision, Translate and Natural Language APIs. You will see how to execute these APIs on your Spark clusters. You will also integrate these services with BigQuery and Storage.
What you learn
In this lab, you: ...
- Enable the Google Cloud Platform machine learning APIs
- Find specific text in a corpus of scanned documents
- Translate a book from English to Spanish using the Translate API
- Perform sentiment analysis on text resulting from a BigQuery query
Introduction
Duration is 5 min
Google's machine learning APIs add amazing new capabilities to big data processing. Using these APIs you can have the computer analyze images, transcribe audio, translate text into other languages and many other things.
Google Cloud Dataproc enables you to build clusters of many computers that enable you to perform these operations quickly, efficiently and at reasonable cost.
In this lab, you will create a Datalab notebook that demonstrates running the machine learning APIs on Dataproc clusters using Spark.
Opening Datalab Notebook
Duration is 5 min
In order to complete this lab you have to have done the previous lab.
Step 1
In your browser, navigate to Datalab by pasting the ip address of the cluster master node and then follow it with :8080. On the Datalab home page click the Home icon and navigate to . Click on ML-Tests-Solution.ipynb to open that notebook.
Step 2
Click Clear | Clear All Cells.
In the first code block, notice that you need an API key. Let's get one.
APIKEY="ENTER API KEY HERE"  # CHANGE
print APIKEY
Enabling Machine Learning APIs
Duration is 10 min
Step 1
You have to generate an API key to use the machine learning APIs. In the Google Cloud Platform Web Console, from the Products and Services menu, choose APIs & services.
In the navigation pane on the left select Credentials. Then, click the Create credentials button and select API key. Copy the generated key to your clipboard and then click the Close button.
Step 2
Go back to your Datalab notebook and paste the API key you just generated over the text ENTER API KEY HERE.
Step 3
Go back to the Web Console to the APIs & services page. Click on the Library link in the navigation pane. In the Search box type Speech. Then, click on the link to the Google Cloud Speech API. Click the __Enable __button on the resulting screen (if not already enabled).
Step 4
Go back to the Library page and type Translate in the search page. As you did with the Speech API, enable the Translation API (if not already enabled).
Step 5
Repeat this process enabling the Vision and Language APIs.
Vision, Transate and NLP on the Spark cluster
Duration is 20 min
Step 1
Go back to your Datalab notebook and plugin the appropriate PROJECT_ID and BUCKET names. Then, read the narrative and execute each cell in turn.
Testing Large Data Sets
Duration is 5 min
Step 1
Find the block of code that reads in Alice in Wonderland. Change the filename to alice-in-wonderland-transformed.txt. This will read the entire book.
Step 2
In the BigQuery query, change the limit from 10 to 1000.
Step 3
Click the drop-down next to the Run button and select Run all cells.
Step 4
It will take a little while to run. Examine the results and the code. Experiment with the code if you like.
Step 5
Click on the Notebook menu and select Save and Checkpoint. Then you can close the tab with this notebook.
Cleaning Up
Duration is 5 min
Step 1
If you would like to, you can download the iPython notebooks you created for later reference. (The starting notebooks are already in GitHub -- this is only if you wish to save your changes.) Open each notebook and from the Notebook menu select Download.
Step 2
Close all the Datalab tabs and return to the Google Cloud Platform Web Console. Use the Products and Services menu to return to the Dataproc service.
Delete any clusters you have created.