|
|
||
|---|---|---|
| bertos | ||
| Design | ||
| DesignMicroAPRSNavspark | ||
| Documentation | ||
| images | ||
| Modem | ||
| .gitignore | ||
| buildrev.h | ||
| COMPILING | ||
| flash | ||
| LICENSE | ||
| Makefile | ||
| README.md | ||
MicroAPRS
MicroAPRS is the APRS fork of MicroModem. It can be built very easily with an Arduino board based on the Atmega 328p, and around 15 common electronics components.
Please read the "Quickstart.pdf" in the Documentation folder for some pointers on building the modem!
Right now the APRS specific documentation is lacking, so all the docs included in this repository is directly from MicroModem, but it should still offer good pointers on building the modem, and getting started. The only difference is the firmware.
Currently a simple serial control protocol is implemented. If there's interest, I could also implement the KISS protocol.
Some features
- Send and receive AX.25 APRS packets
- Full software modulation and demodulation, minimal extra hardware required
- Easy configuration of callsign and path settings
- Flexibility in how received packets are output over serial connection
- Persistent configuration stored in EEPROM
- Shorthand functions for sending location updates and messages, so you don't need to manually create the packets
- Ability to send raw packets
- Support for settings APRS symbols
- Support for power/height/gain info in location updates
- Ability to automatically ACK messages adressed to the modem
Modem control
Here's how to control the APRS modem over a serial connection. The modem accepts a variety of commands for setting options and sending packets. Generally a command starts with one or more characters defining the command, and then whatever data is needed to set the options for that command. Here's a list of the currently available commands:
##Serial commands
| Command | Description |
|---|---|
| !<data> | Send raw packet |
| @<cmt> | Send location update (cmt = optional comment) |
| #<msg> | Send APRS message |
| c<call> | Set your callsign |
| d<call> | Set destination callsign |
| 1<call> | Set PATH1 callsign |
| 2<call> | Set PATH2 callsign |
| sc<ssid> | Set your SSID |
| sd<ssid> | Set destination SSID |
| s1<ssid> | Set PATH1 SSID |
| s2<ssid> | Set PATH2 SSID |
| lla<LAT> | Set latitude (NMEA-format, eg 4903.50N) |
| llo<LON> | Set latitude (NMEA-format, eg 07201.75W) |
| lp<0-9> | Set TX power info |
| lh<0-9> | Set antenna height info |
| lg<0-9> | Set antenna gain info |
| ld<0-9> | Set antenna directivity info |
| ls<sym> | Select symbol |
| lt<s/a> | Select symbol table (standard/alternate) |
| mc<call> | Set message recipient callsign |
| ms<ssid> | Set message recipient SSID |
| mr<ssid> | Retry last message |
| ma<1/0> | Automatic message ACK on/off |
| ps<1/0> | Print SRC on/off |
| pd<1/0> | Print DST on/off |
| pp<1/0> | Print PATH on/off |
| pm<1/0> | Print DATA on/off |
| pi<1/0> | Print INFO on/off |
| v<1/0> | Verbose mode on/off |
| V<1/0> | Silent mode on/off |
| S | Save configuration |
| L | Load configuration |
| C | Clear configuration |
| H | Print configuration |
Examples
To set your callsign to XX1YYY-5, and then save the configuration, send these three commands:
cXX1YYY
sc5
S
To send an APRS message to ZZ5ABC-1 with the content "Hi there!", send these commands:
mcZZ5ABC
ms1
#Hi there!
To send a location update, with the comment "MicroAPRS", you can do something like this:
lla5230.70N
llo01043.70E
@MicroAPRS
To send an APRS message to ZZ5ABC-1 with the content "Hi there!", using a raw packet, send this command:
!:ZZ5ABC-1 :Hi there!{01
Here's an example of how to send a location update with power, height and gain information, using a raw packet:
!=5230.70N/01043.70E-PHG2410Arduino MicroAPRS
EEPROM Settings
When saving the configuration, it is written to EEPROM, so it will persist between poweroffs. If a configuration has been stored, it will automatically be loaded when the modem powers up. The configuration can be cleared by sending the "clear configuration" command (C).
Serial Connection
To connect to the modem use 9600 baud, 8N1 serial. By default, the firmware uses time-sensitive input, which means that it will buffer serial data as it comes in, and when it has received no data for a few milliseconds, it will start interpreting whatever it has received. This means you need to set your serial terminal program to not send data for every keystroke, but only on new-line, or pressing send or whatever. If you do not want this behaviour, you can compile the firmware with the DEBUG flag set, which will make the modem wait for a new-line character before interpreting the received data. I would generally advise against this though, since it means that you cannot have newline characters in whatever data you want to send!
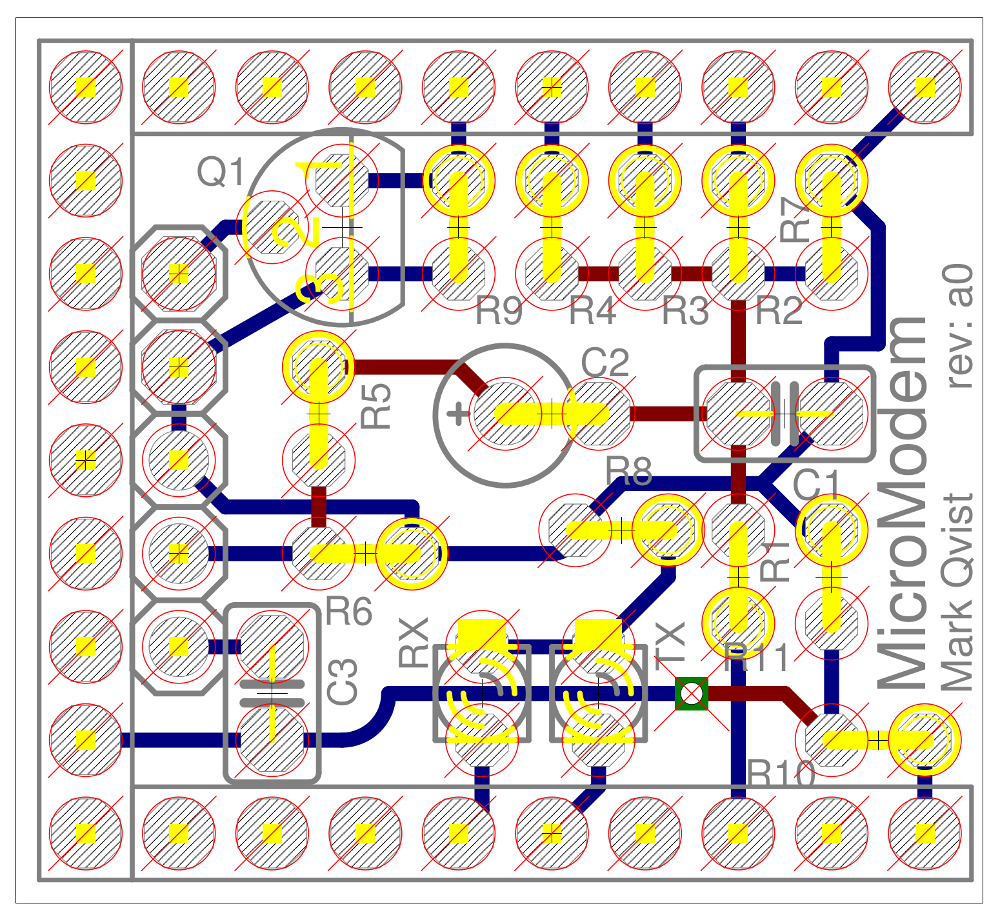
The repository contains schematics and Eagle PCB files for a Microduino module. There is also fritzing sketches for both an Arduino shield and a Microduino module, with notes so they are easier to understand. I have had the eagle PCB fabricated, and it is working great, so you can use that if want to make your own board.
While this project is based on Arduino hardware, it does not use the Arduino IDE. The project has been implemented in your normal C with makefile style, and uses libraries from the open source BertOS.
Visit my site for questions, comments and other details.

